[1OFFICE] ANNOUNCEMENT: NEW VERSION OF THE OBJECT APPROVAL WORKFLOW
Dear valued customers,


1Office is pleased to announce the launch of the latest version of the Object Approval Process with an intuitive interface, easy management, setup, and multi-step automation.
Scheduled upgrade time: 18:00, March 01, 2024
Specifically, the latest version of the Approval Process offers the following highlights:
- The interface for nodes within the process is more modern, intuitive, and easier to set up than the previous version.
- The management screen, which includes statistical data and version history, helps users easily track, evaluate, and reuse previous process versions if needed.
- Additional automated nodes such as scheduling, sending emails, and notifications help make the approval process faster and more efficient.
- Approval processes are now set up for each specific object individually, rather than in the general BPA screen as before, making them easier to manage, track, and avoiding confusion during setup.
To use the approval process feature, please go to the General Settings of the object to configure it.
Note: The following guide demonstrates how to set up an approval process for the “Leave Request” object. You can apply the same steps to set up processes for other objects.
1. Create a new process template
Step 1: Go to the object > Select Settings > Select General Settings > Select Approval Process
Step 2: Set up the process template
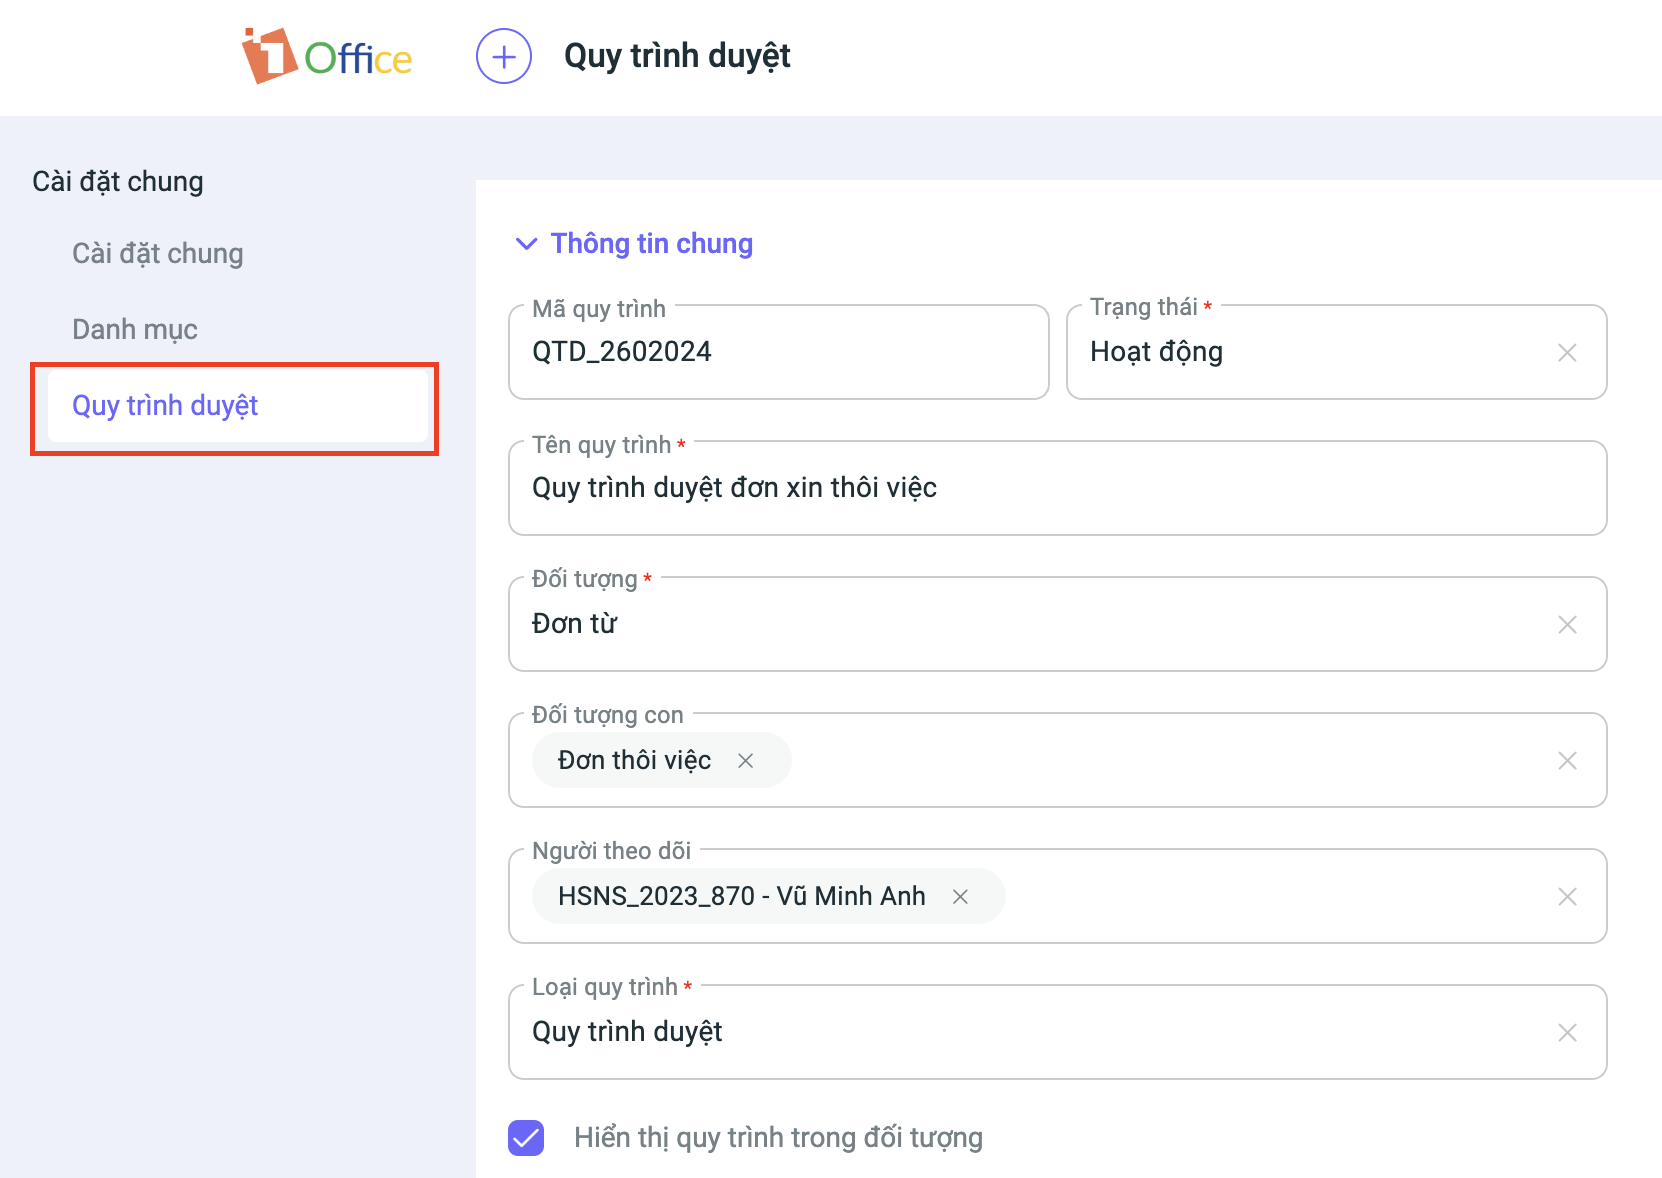
- Process name
- Status: Select Active or Paused for the process
- Object: Select one or more child objects in the system to apply the process to
- Followers: Select users who can view the process and receive notifications about its progress
- Display approval process in the object: Choose yes or no to display the approval process in the object’s details section
- Process type: Choose one of the following two process types:
- Approval process: Set up conditions and approvers for each step in the process
- Optional approver: Set up approvers for each step and allow users to select an approver when submitting for approval
Note: Each object can only have one approval process. The system will display a warning if you create a new process for an object that already has one.
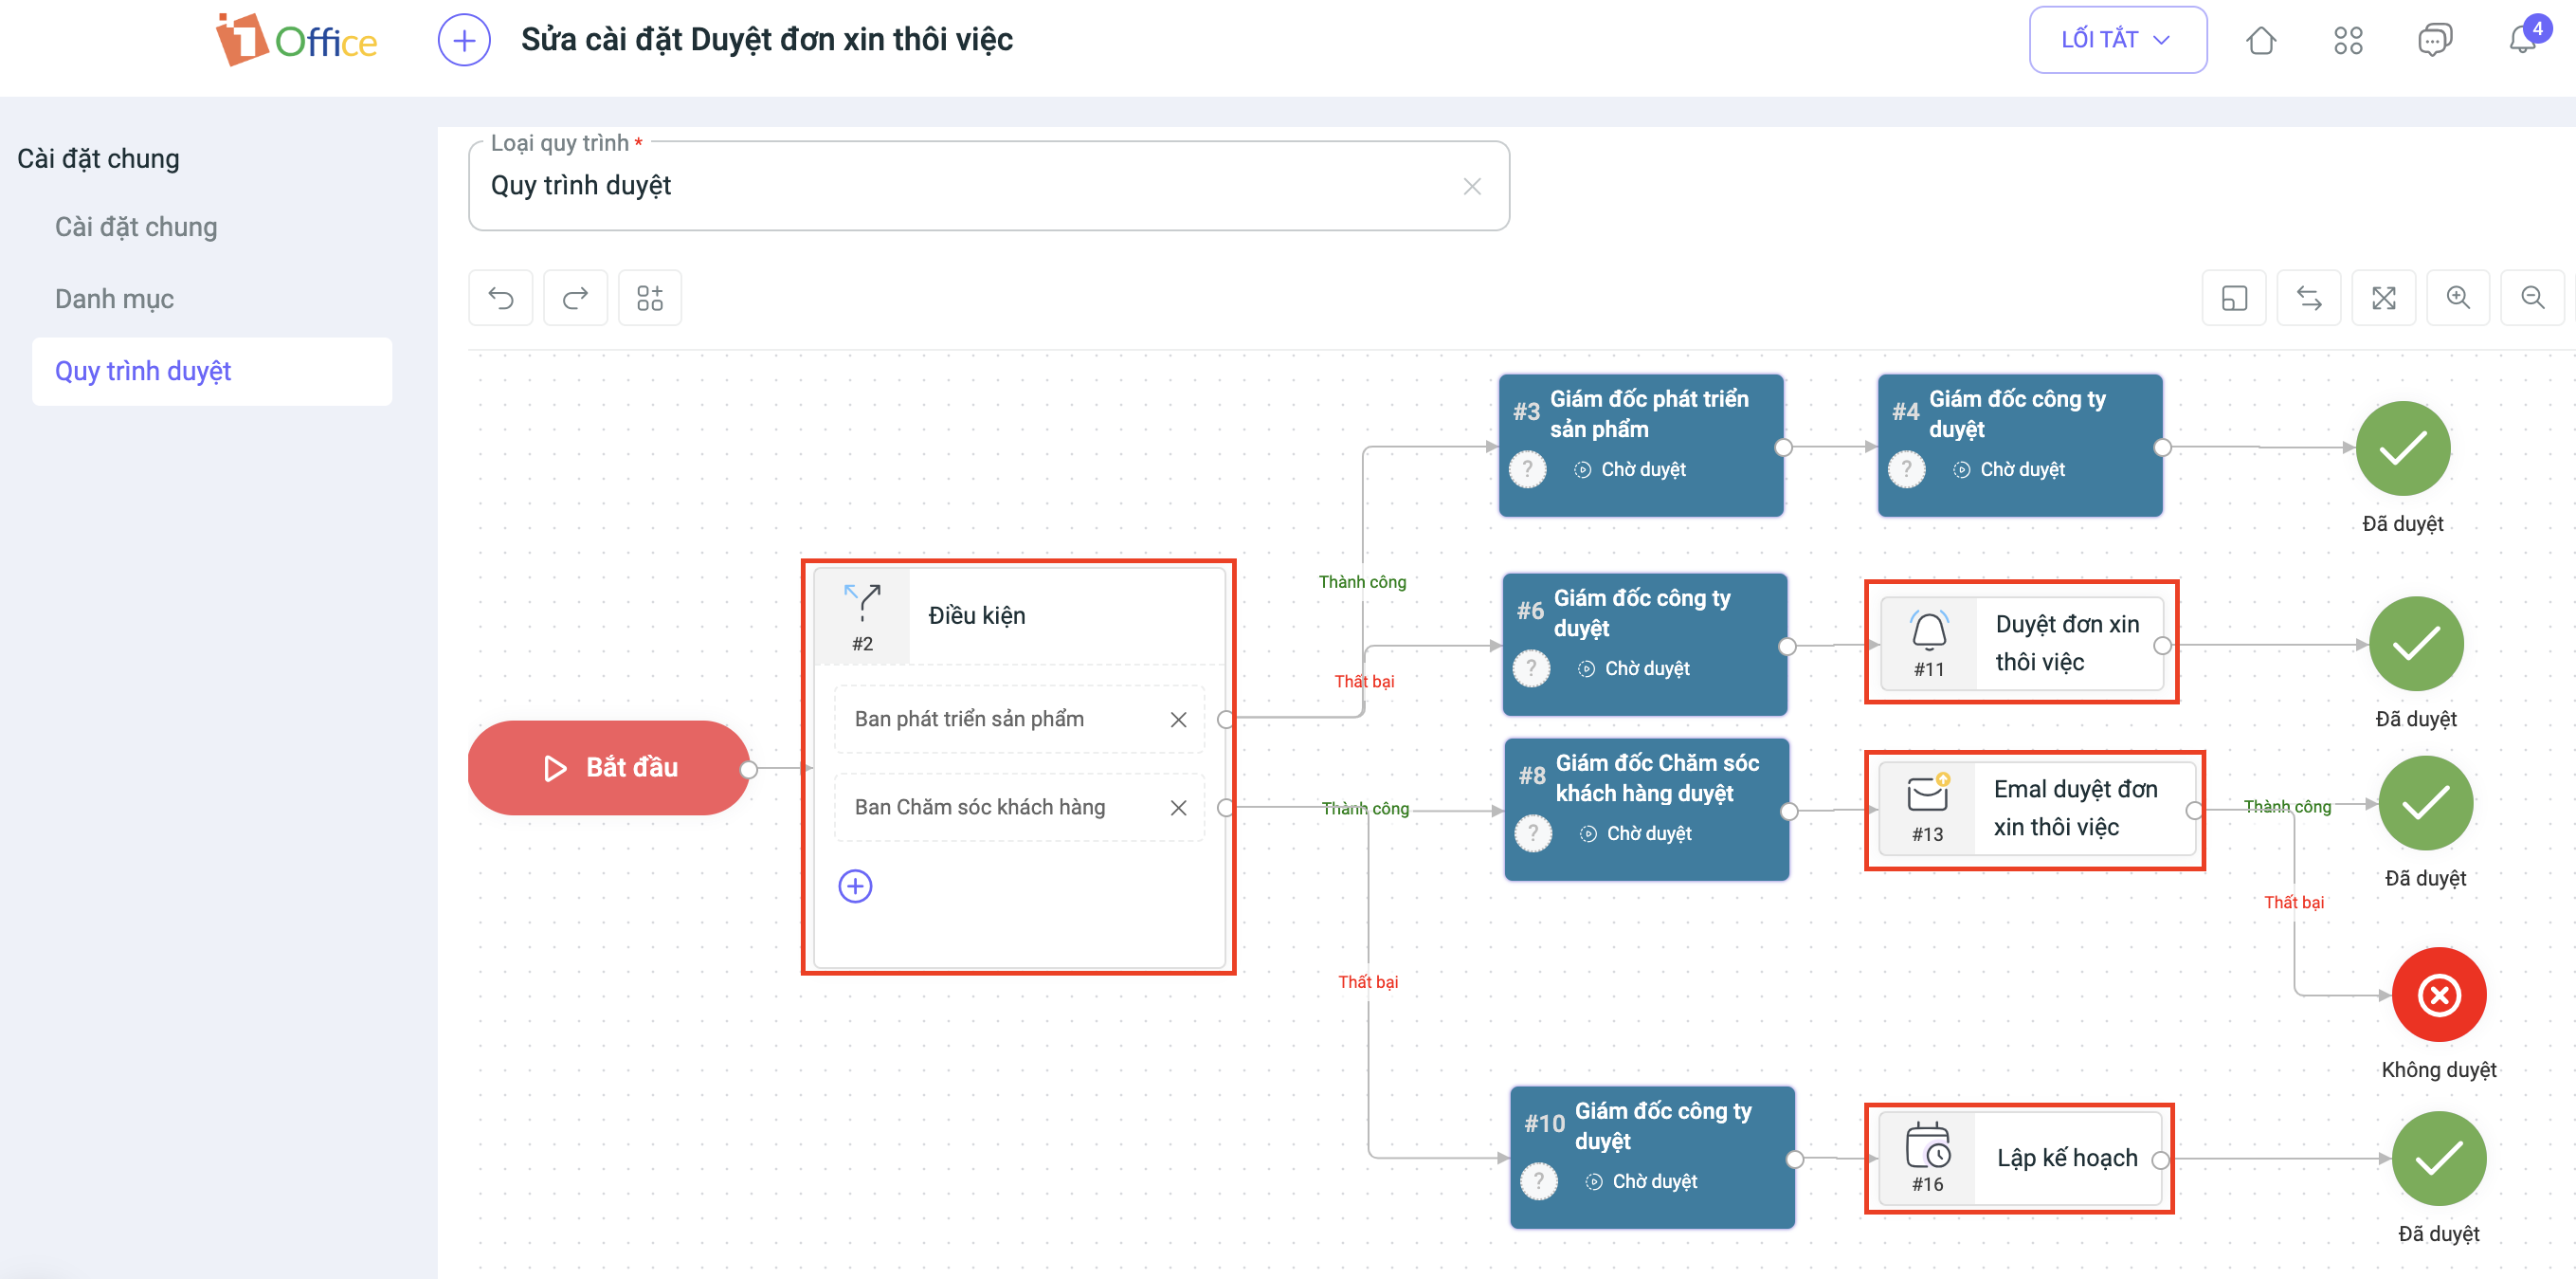
Some notable nodes in the new version of the approval process:
- Condition: The new condition node allows you to group multiple conditions into a single node, making the approval process simpler, more intuitive, and more efficient. This node also supports flexible branching, improving work processing capabilities and reducing errors.
- Notification: Automatically sends notifications to users with pre-composed content.
- Email: Automatically sends emails with pre-configured content.
- Schedule: Set a delay time before executing the next action.

Step 3: Update
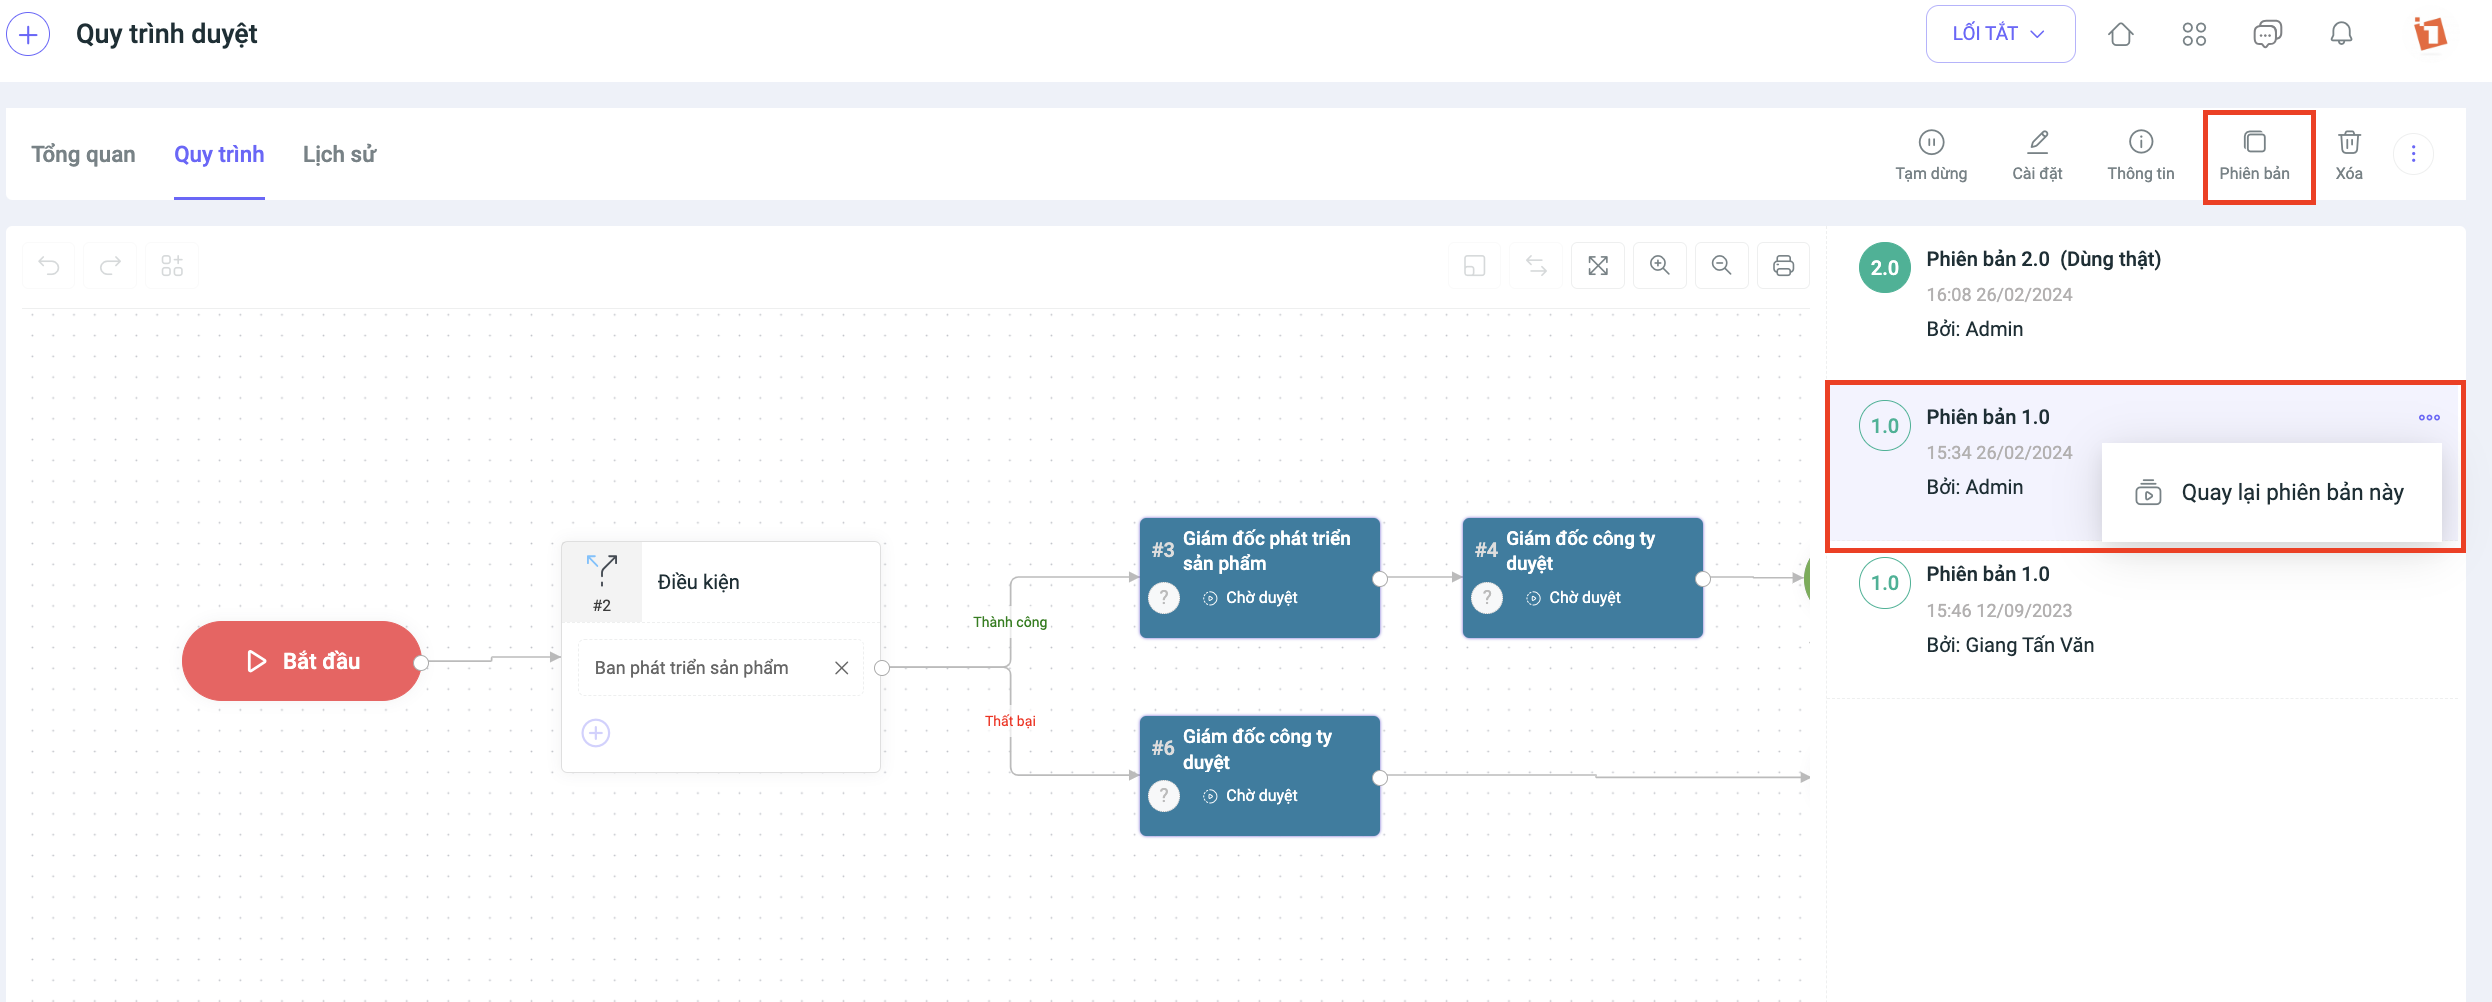
After updating to the new version of the Approval Process, all processes will be saved in the History screen with specific statistics, helping to improve the efficiency of work management within the process. On the Overview screen, users can:
- Track statistical reports on approval processes by Week, month, quarter, year.
- View the number of objects that are pending, approved, and rejected for each process.
- View the detailed run history for each object.

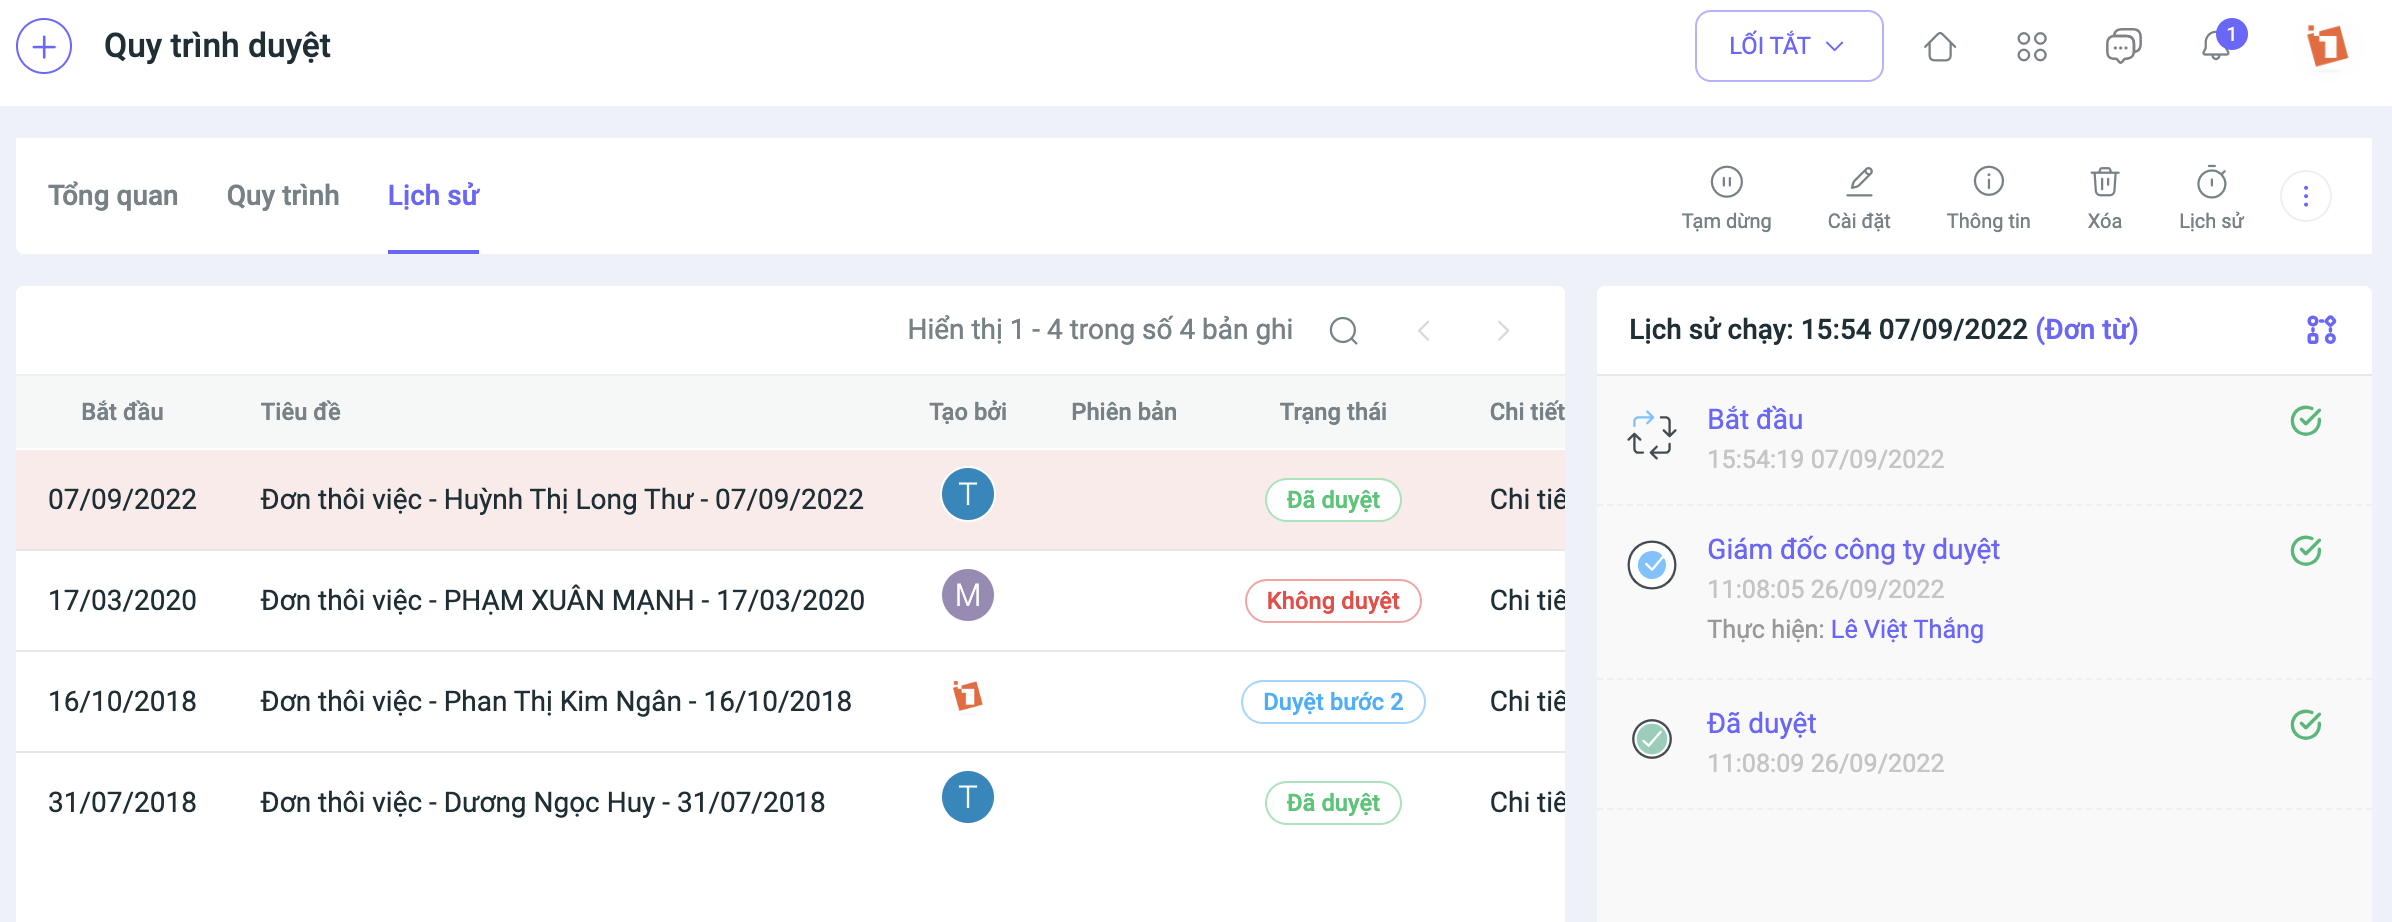
Notably, the new approval process version includes a Version History Archive feature, which allows users to easily reuse previous versions.
2. Displaying the approval process in object details
If you apply an approval process and enable its display in the object, you can view the Approval Process tab in the object’s details to track its approval status.
Note: This feature update is performed periodically and will not affect customer data in any way. The system will resume normal operations after the specified time. We kindly ask that you take note of the update schedule to avoid any disruption to your business operations. For any further information or support, please contact us via:
- Customer Support Hotline: 1900 3313
- Email: support@1office.vn
- Live chat on the Ticket software
Best regards,
The 1Office Product Development Team.